The journey begins… In late 2017 I decided that when my daughter left for college, I would move out of the Dallas suburbs to a small town in southeastern Oklahoma and buy some old craftsmen style homes to remodel and flip to rentals.
The location was chosen due to proximity to my hunting land and the housing/rental market in the area. After months of searching, I located a prime property for my first purchase and base of operations. The house has good bones and original hardwoods throughout all the living areas and the two main bedrooms. The bathroom and kitchen will need to be gutted and modernized, and drywall put up in place of the wood paneling that was likely added in the late 60’s to early 70’s based on the materials.
The house was a foreclosure that had been sitting for some time and isn’t much to look at… yet. After a lot of back and forth with the bank, we finally settled on an offer, and I closed in late July 2018. I purged most of my belongings as every room in the house will need some work, and the house is just over 1300sft. Everything in these old style homes is small. The kitchen, the bathroom, the bedrooms, the closets all are small which creates a challenge. At almost 9000sft the corner lot size is the one significant thing the property does have. The large lot size does add quite a bit of upkeep and work, but this tends to be a time issue and the cheaper of the upgrades to come.
Spare Room Remodel: This Old House: 1945 Craftsmen Style Remodel – Spare Room
Laundry/Mud Room Remodel: This Old House: 1945 Craftsmen Style Remodel – Laundry/Mudroom
Kitchen Remodel: This Old House: 1945 Craftsmen Style Remodel – Kitchen
Spare Room Remodel
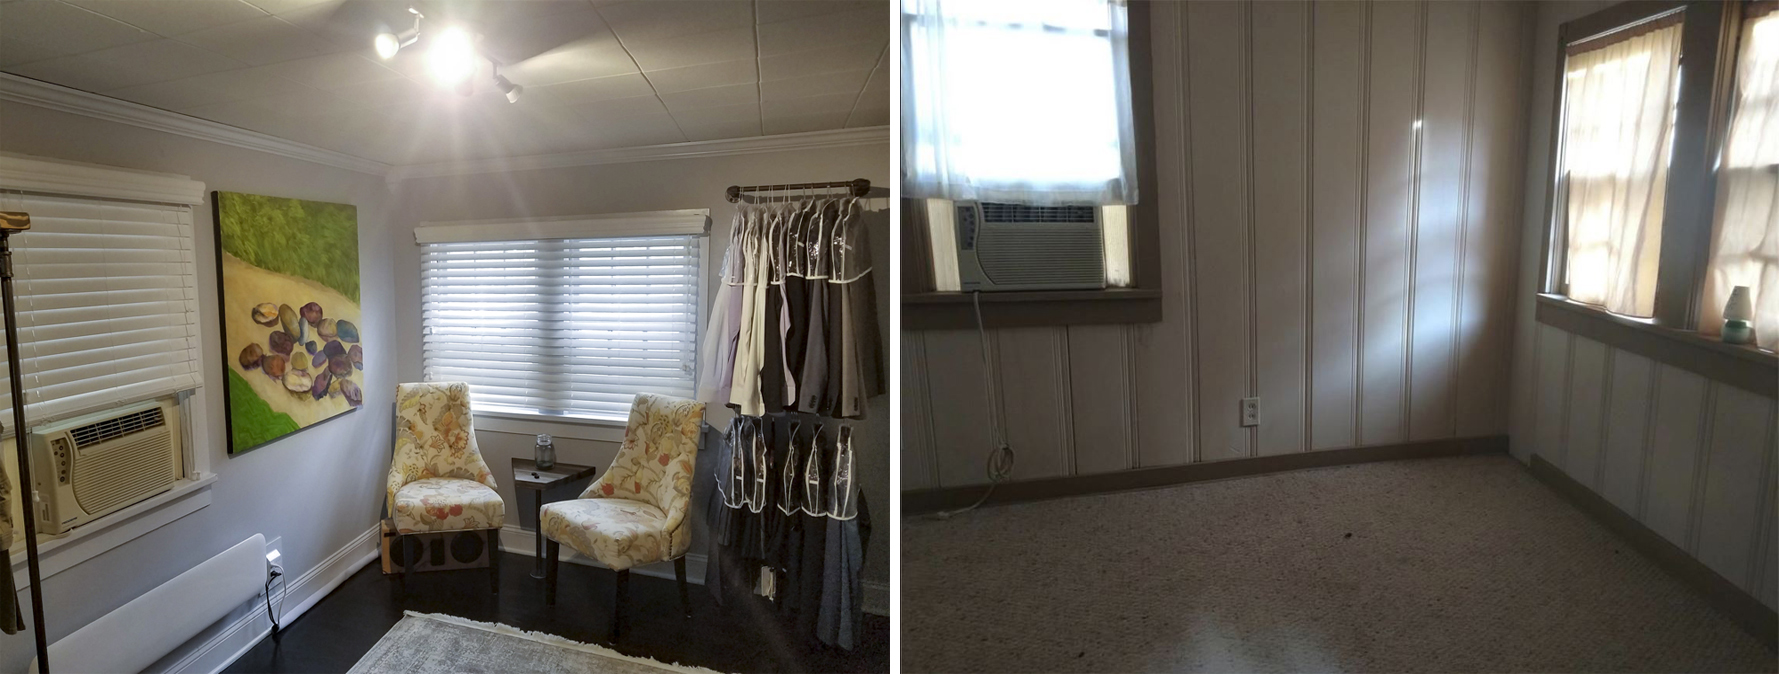
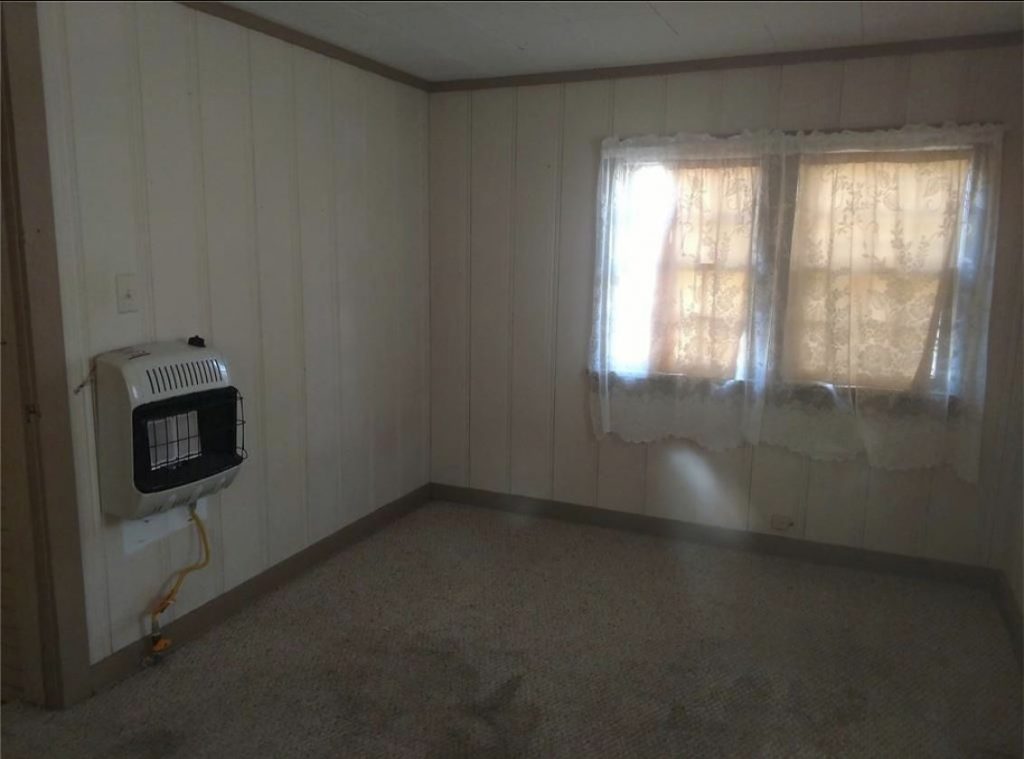
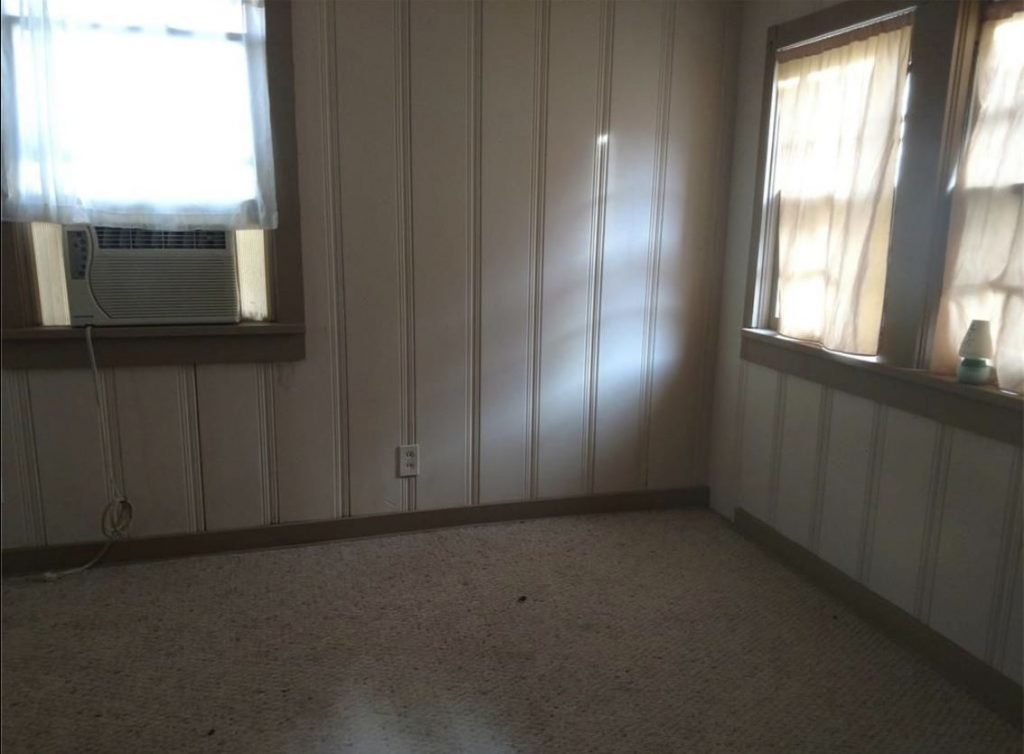
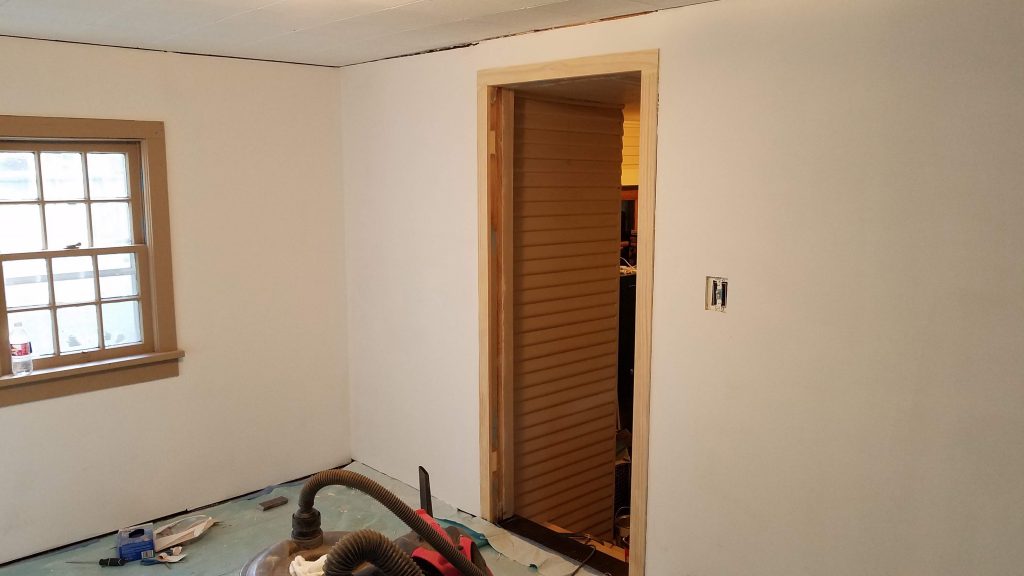
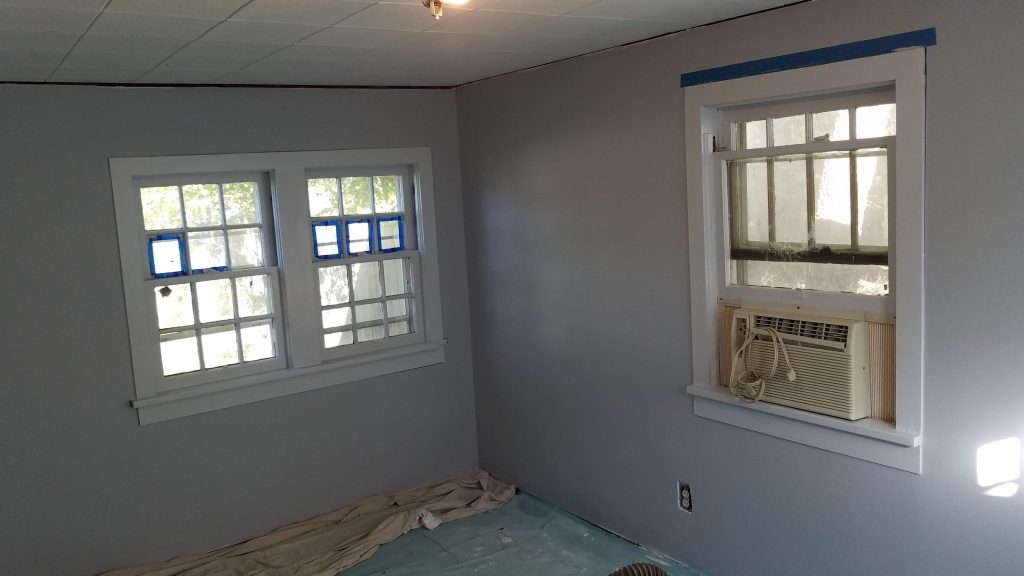
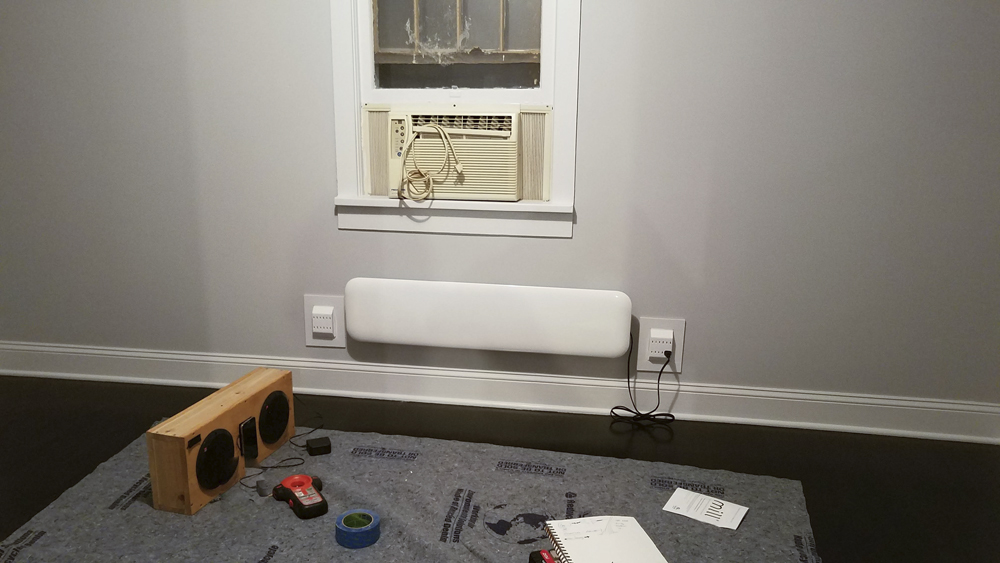
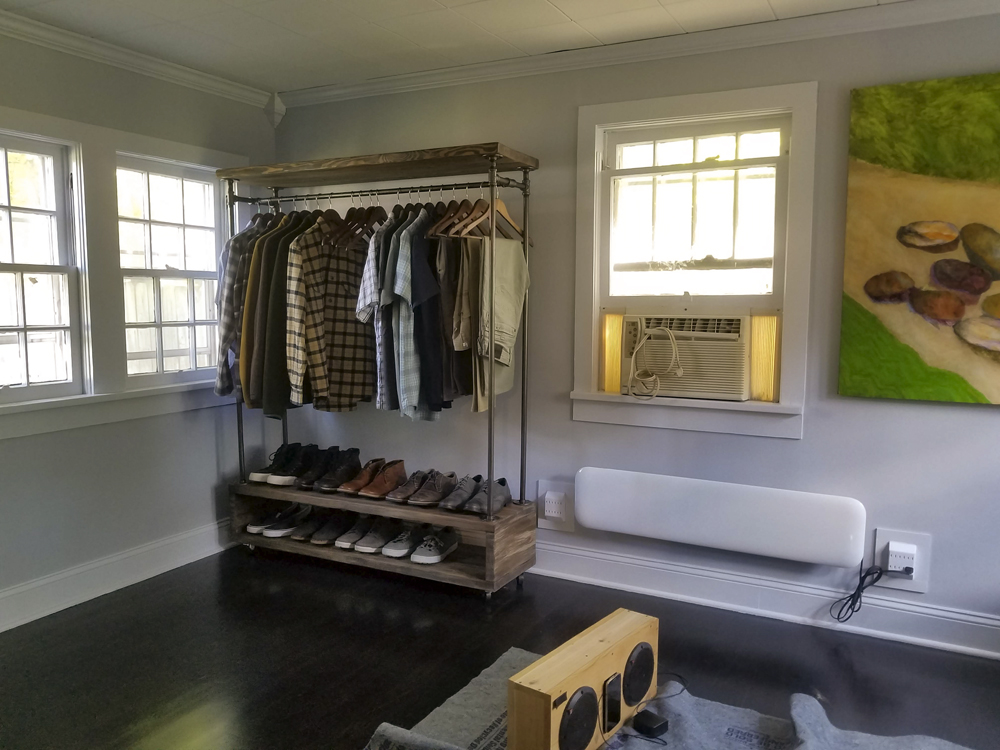
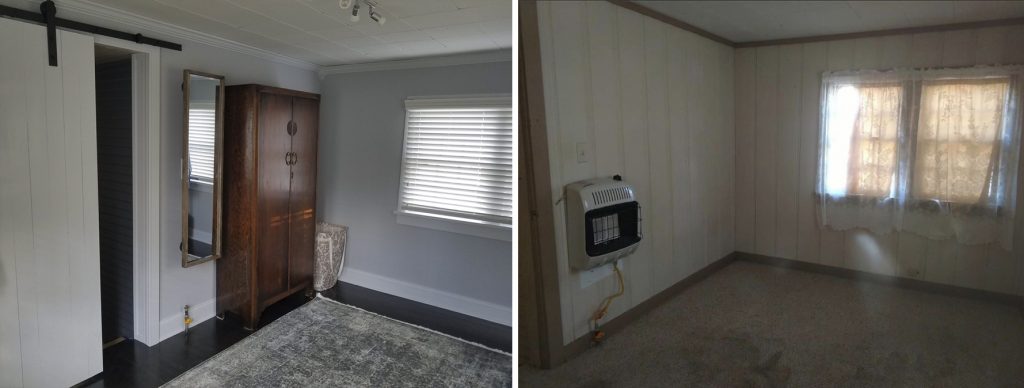
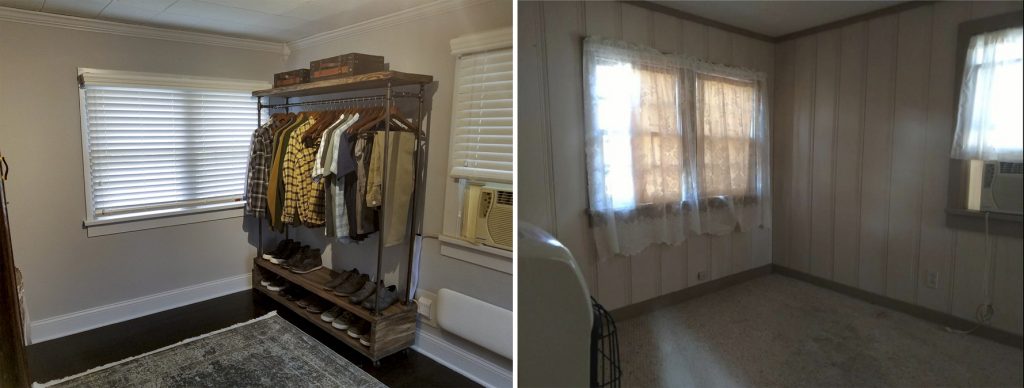
The house had an addition added to the back which contains a small third bedroom/office, a laundry room, and extra storage space. This area is not maintained by the central heat and air requiring a window AC unit and portable electric radiator. It does have a gas line, but I had the gas line capped and removed the gas wall heater as the room size is too small which creates a safety hazard. I may end up putting in a split duct unit for this space at some point or upgrade the window AC unit. This room is too small to be considered the third bedroom in my opinion, so I am going build it out as a large walk-in closet.
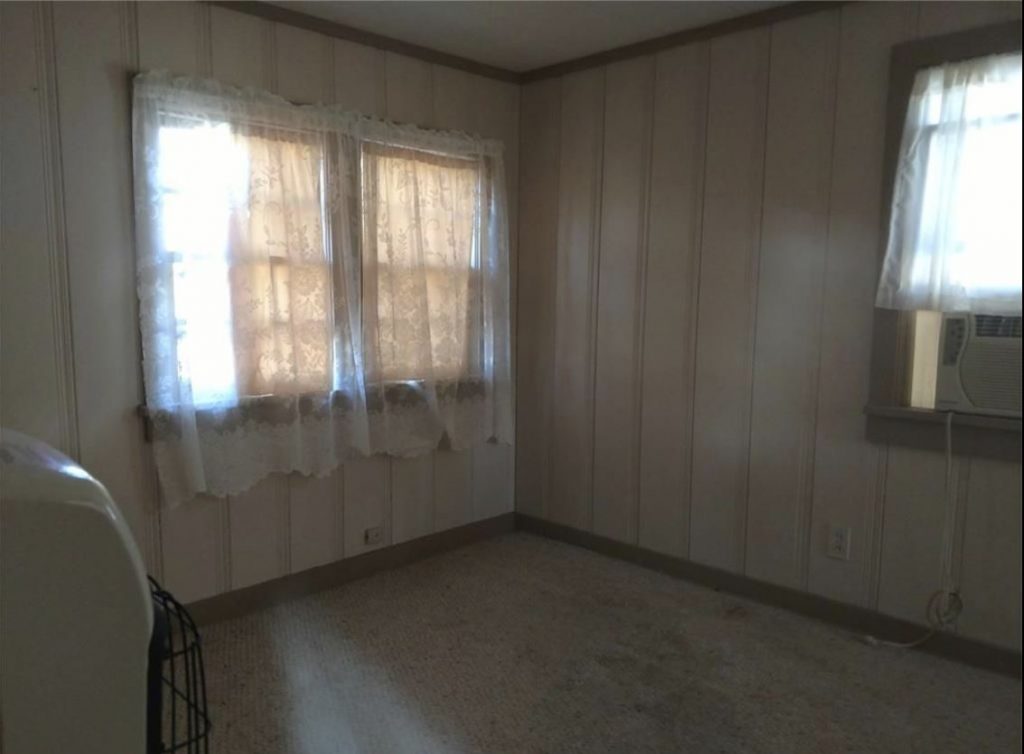
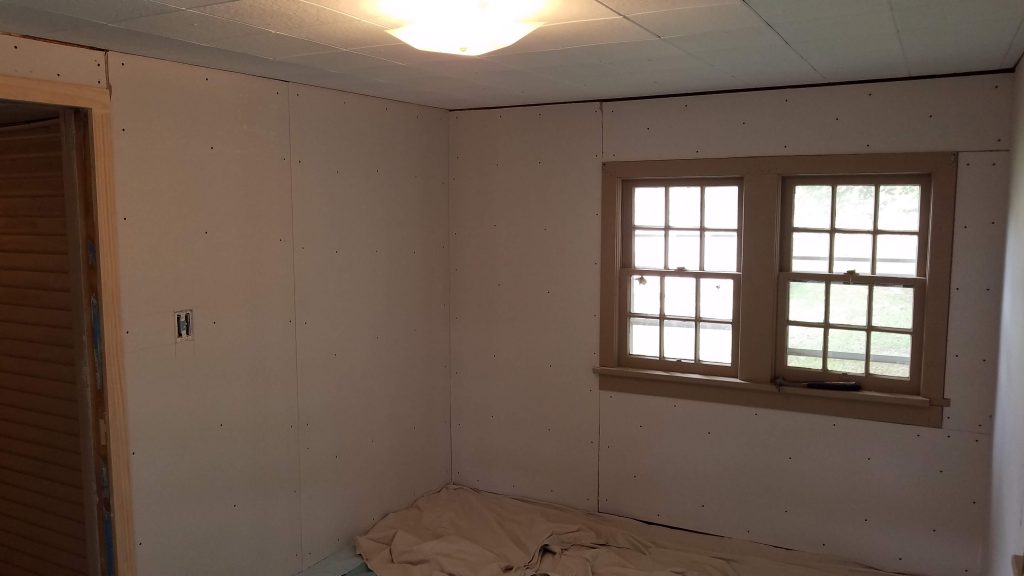
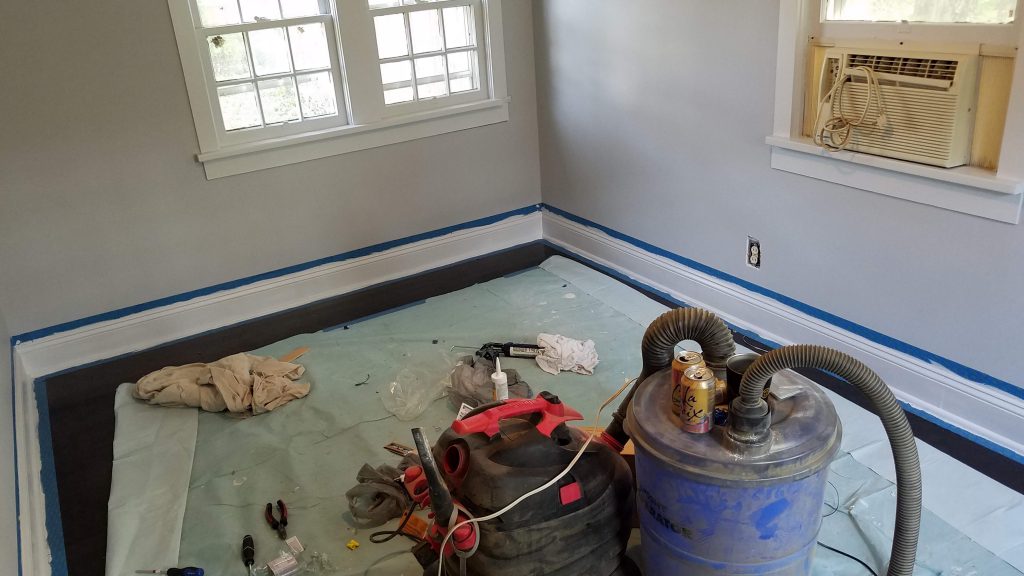
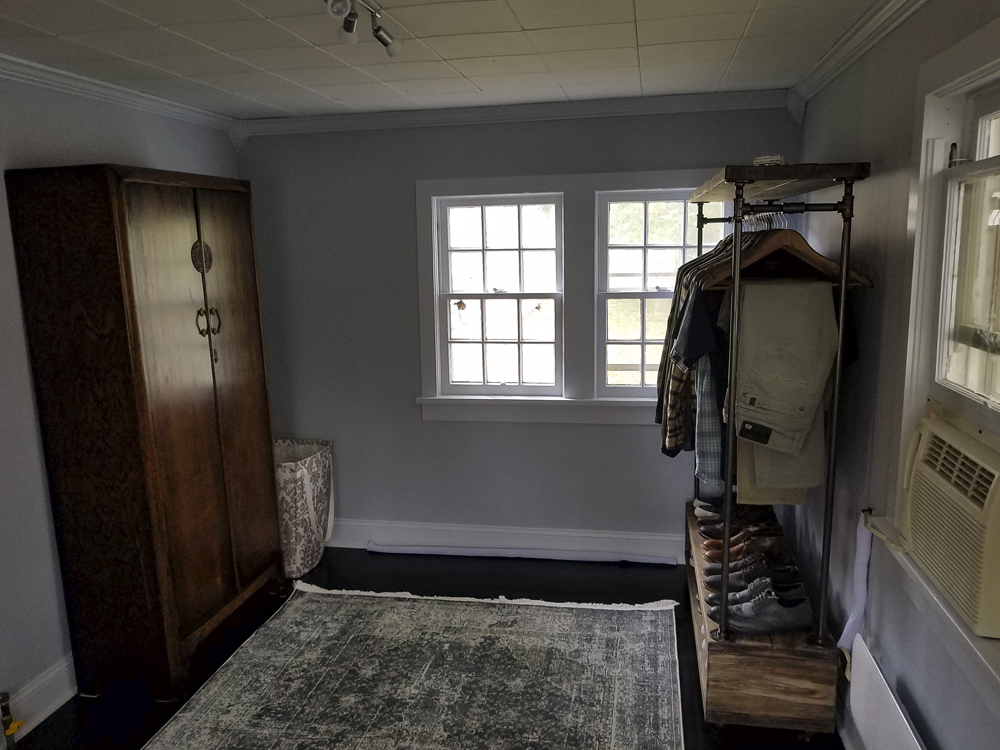
What I have to work with
It’s old, dingy and covered with wood paneling, dirty carpet, and an awful color pallet.
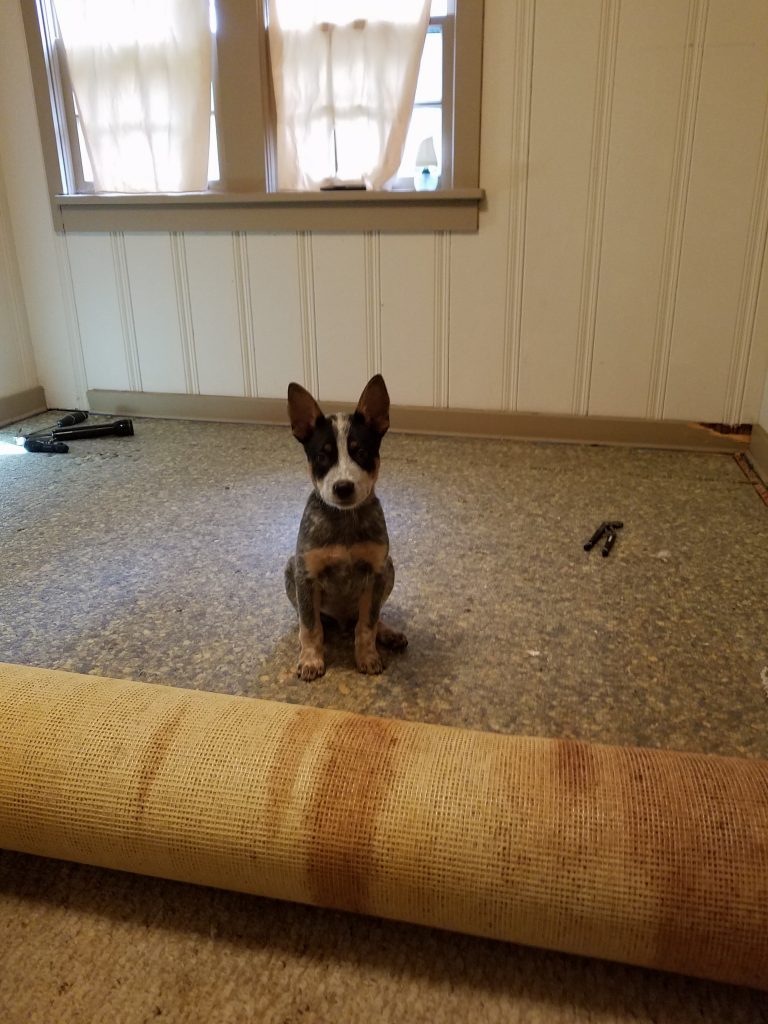
First order of business is removing the baseboards and trim and pulling the old carpet to prep the floors for new flooring. My thought is to cover the floors with a vinyl plank or bamboo. Something cost-effective and durable.
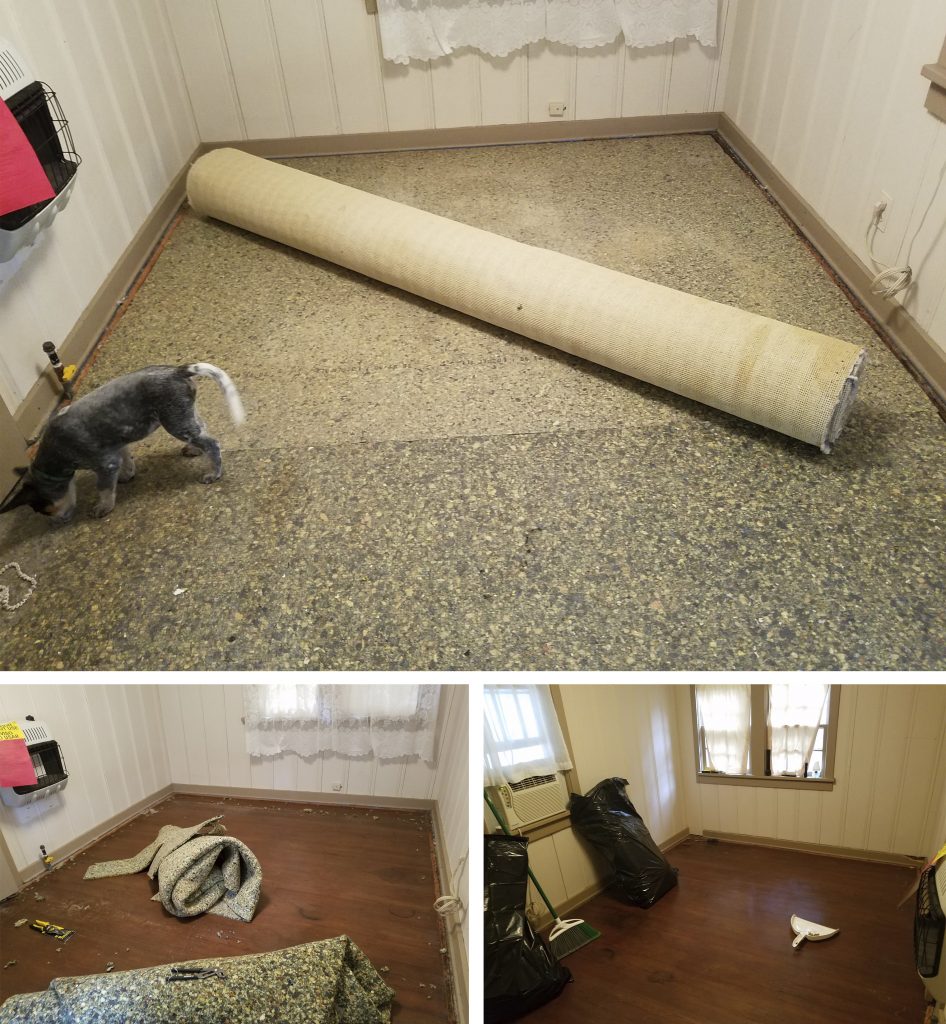
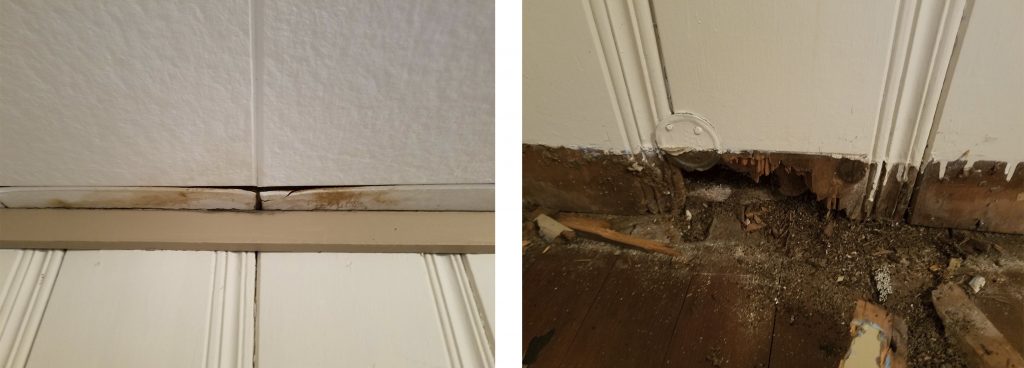
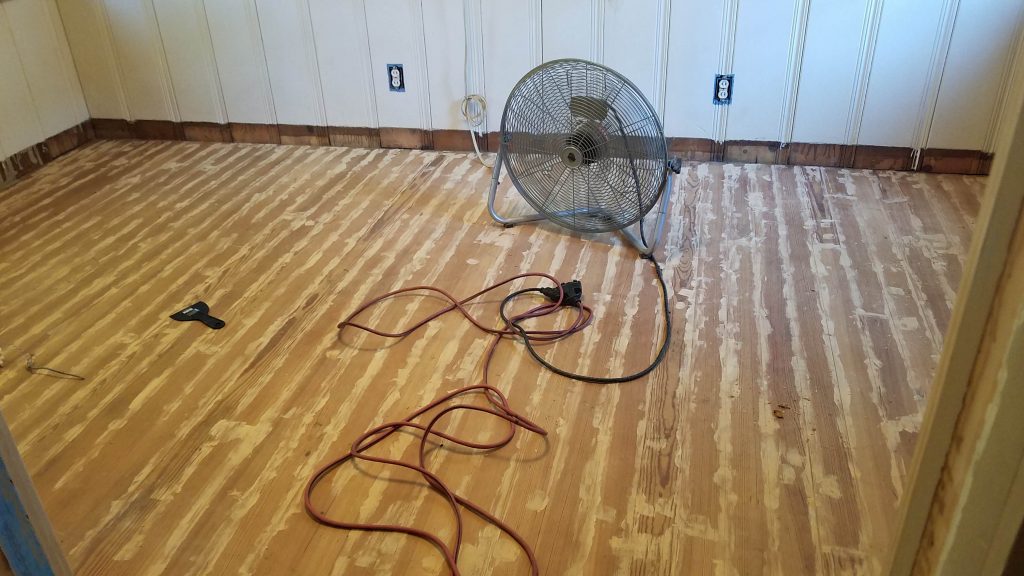
Ran into a few surprises while removing the old carpet. The best discovery was underneath the old ratty, and stained carpet hid the original red oak hardwood floors. I was not expecting this due to the cheap carpet that was over them. Structurally they are in good shape. There is some pretty bad stains and scratches in the flooring but nothing that shouldn’t be fixable. The next good surprise is that the paneling in this room is 3/4 inch which I don’t have to remove and will be able to cover with either 1/4 in or 3/8 in drywall easily. The one issue I uncovered is water damage at the floor and ceiling. From the outside, there is evidence of some roof repair in this area, and it caused some minor damage that I’ll have to deal with.
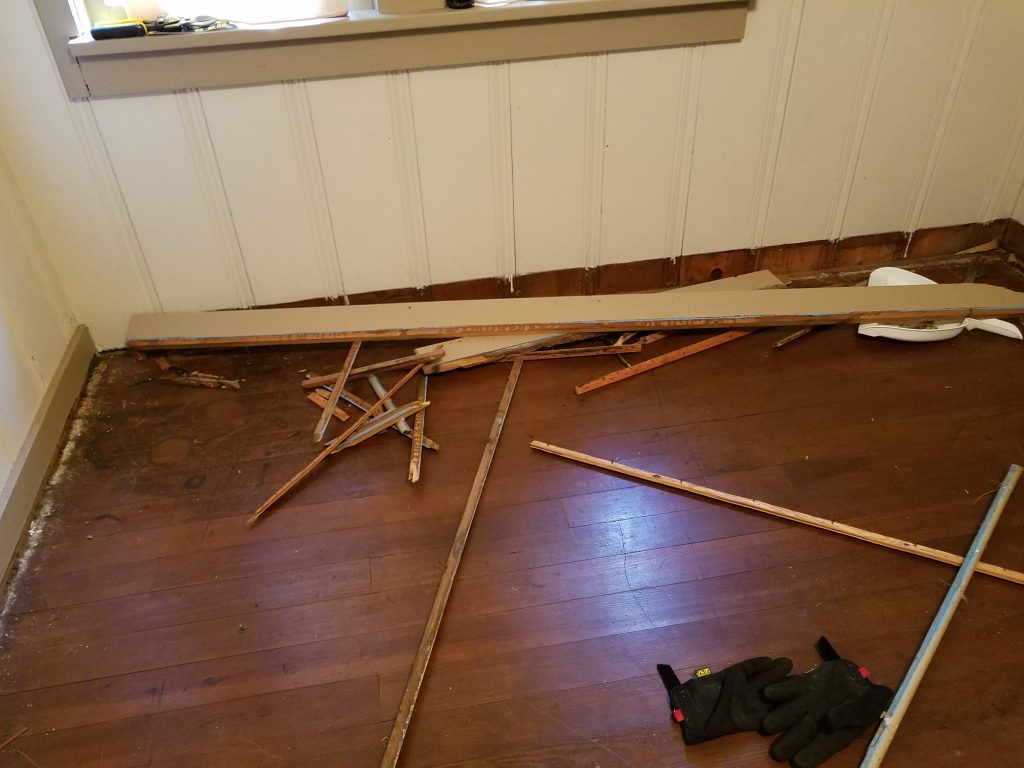
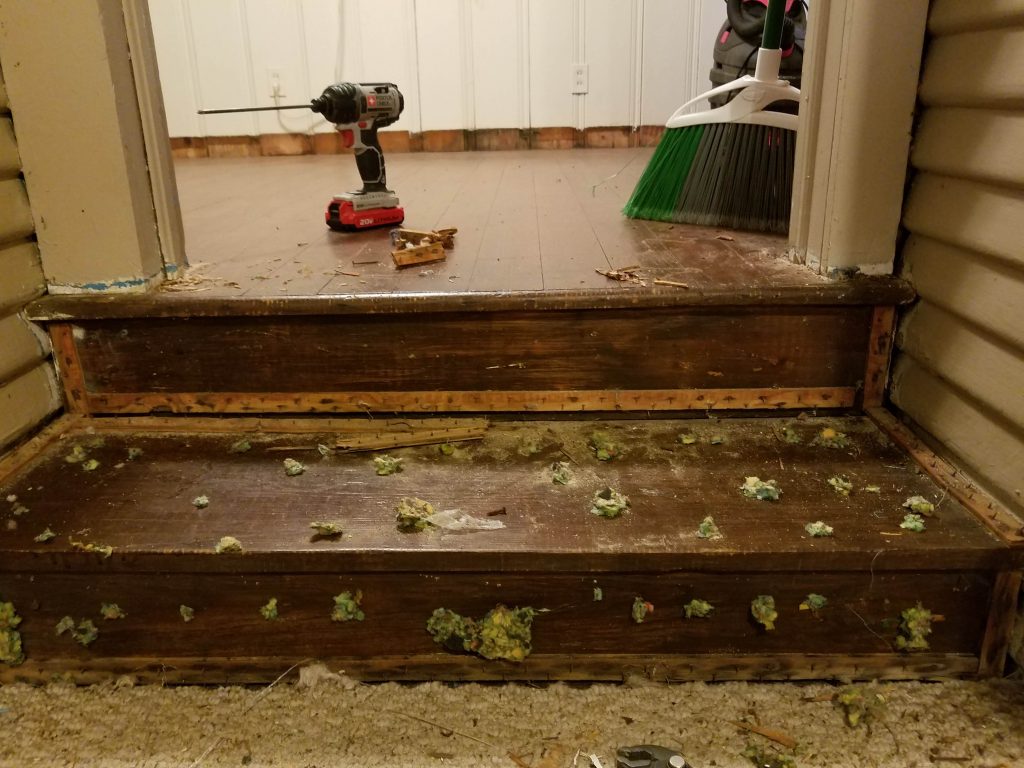
The steps leading into the room will also have to be redone as they are in very poor condition after pulling up the carpet on them.
After all the nails, staples, and tac-boards were removed, it was time to get busy repairing the water damaged area and start sanding to see if I could get the floors in decent enough shape without having to rent a standing floor sander.
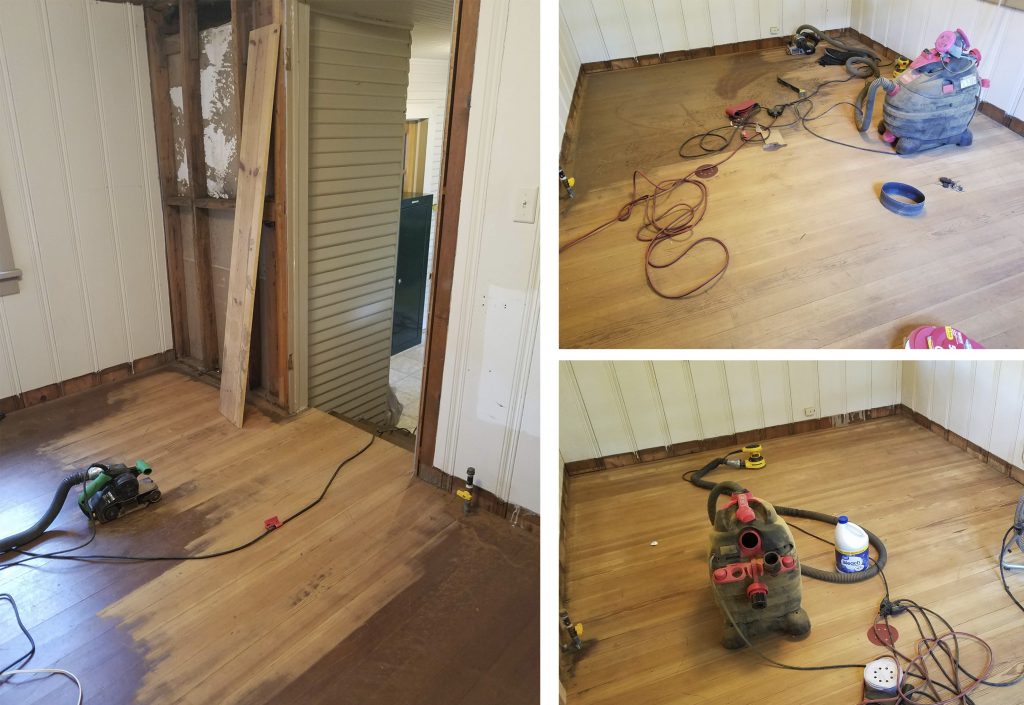
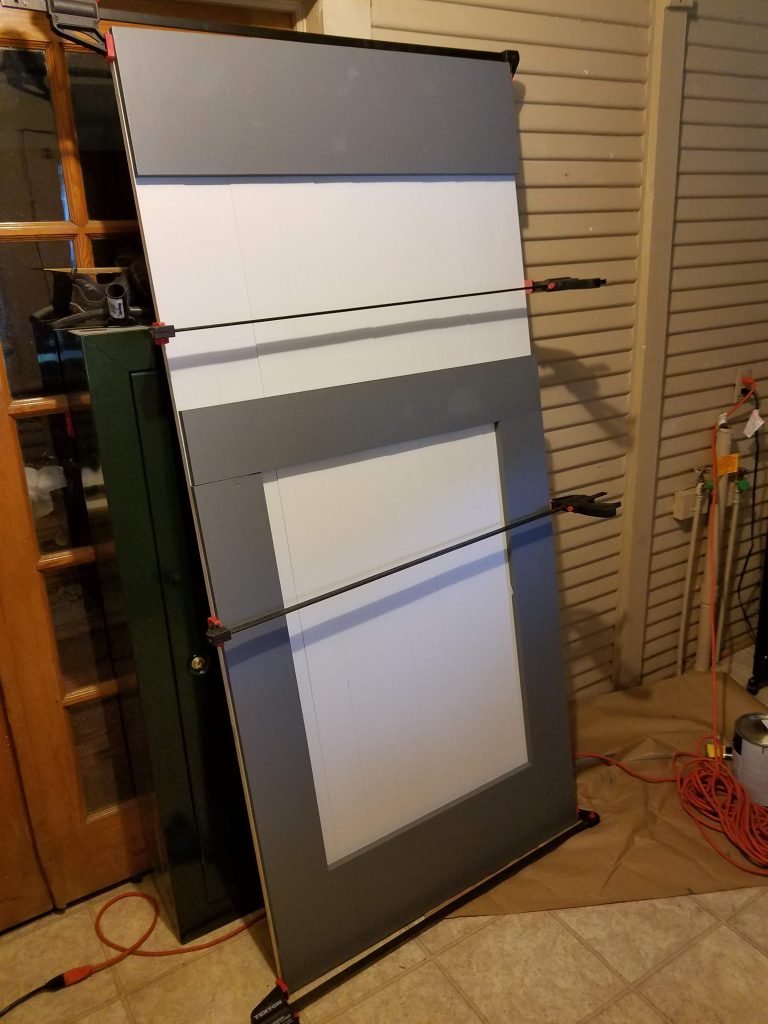
Sanded and cleaned up. It’s a pretty small space 8.5 ft x 14 ft so I decided I would use my Porter Cable hand belt sander. Bad decision, next time I will rent a floor sander as the belt sander was to much time and effort. Time to repair the ceiling, wall, fill in the rotted floorboard sections, the seams, scratches, and nail holes.
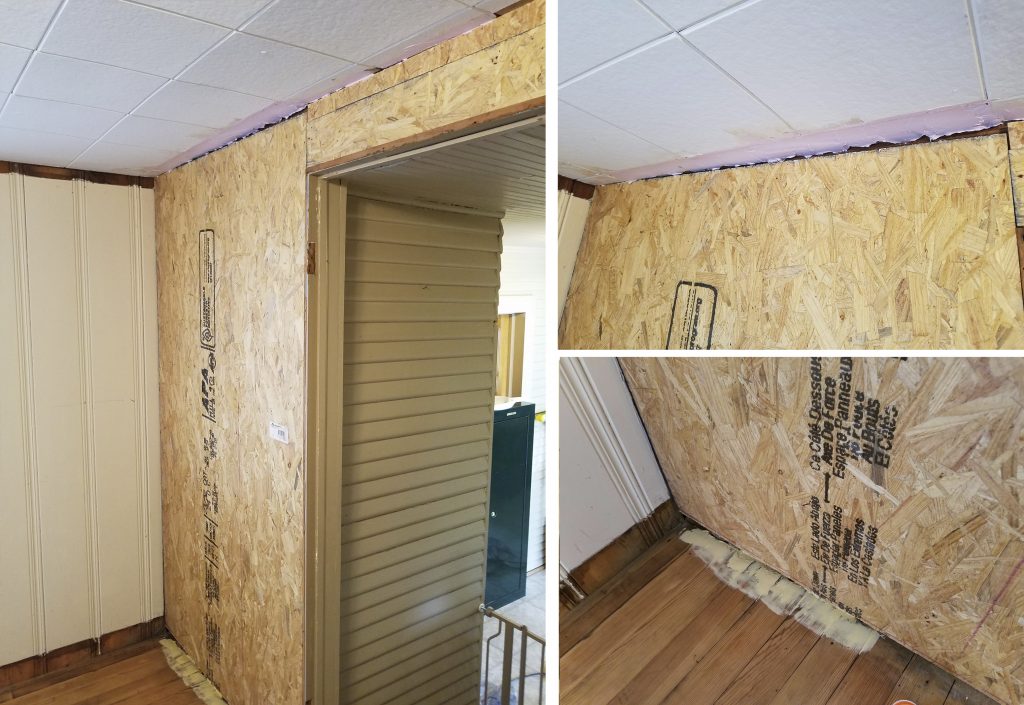
Since the floorboards only had small bad spots, I cleaned out the rotted wood and just filled the space with a few applications of wood filler which I’ll sand down and most will be covered up by the baseboard trim. The ceiling took a little creativity as it is an engineered interlocking fiberboard. Not even sure I could find the same material if I wanted to. The fiberboard is about 3/8 in thick, so I cut a section of 1/4 in plywood to the dimensions of the material I had to remove and then filled it in with a spackling compound to get the approximate texture. When the crown molding is picked out ill re-work the section a bit more before painting the ceiling. I replaced the wall section with fresh 3/4 in pressboard.
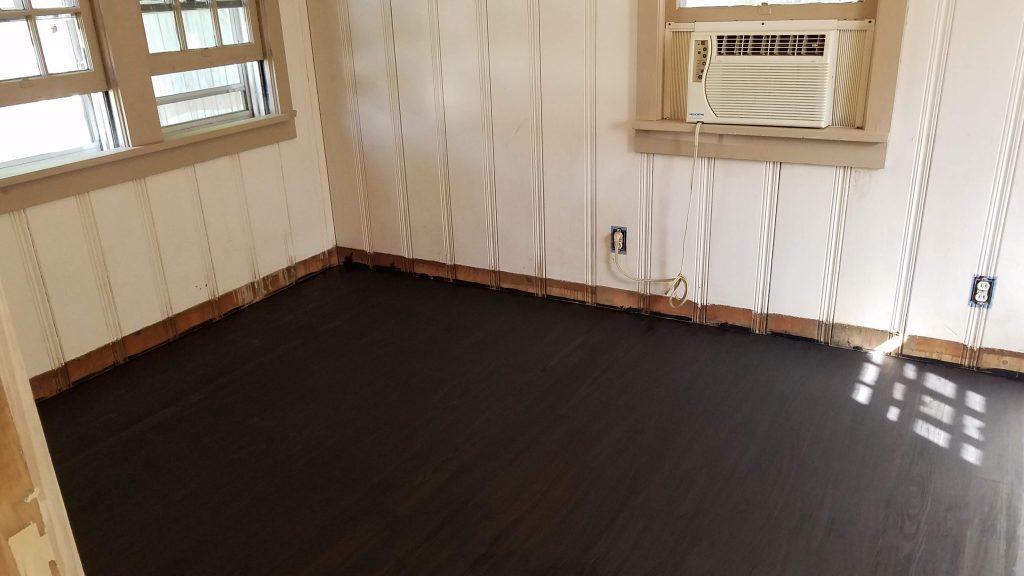
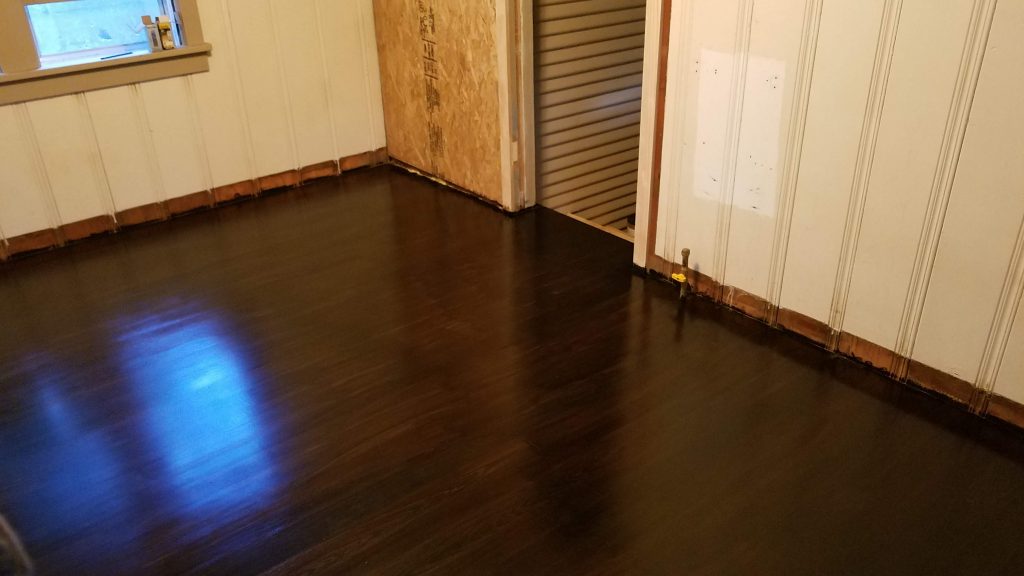
After a final sanding and clean up its time to stain and seal the floors. Although I did get most of the stains and imperfections out of the floorboards, I decided to go with an ebony stain over a 100 grit final sanding to hide as much of the flaws as possible.
Next step is to cut and hang the drywall. I picked up the 3/8 in sheets to finish out the room. I would have preferred 1/4 in, but no one stocks it so 3/8’s it is. Now doing this by my self I had to cut and hang with some less than optimal joints but it is going to be a closet, and I might do distressed wood on the back wall. Anyway, after two days of work, everything was cut and hung and ready to tape.
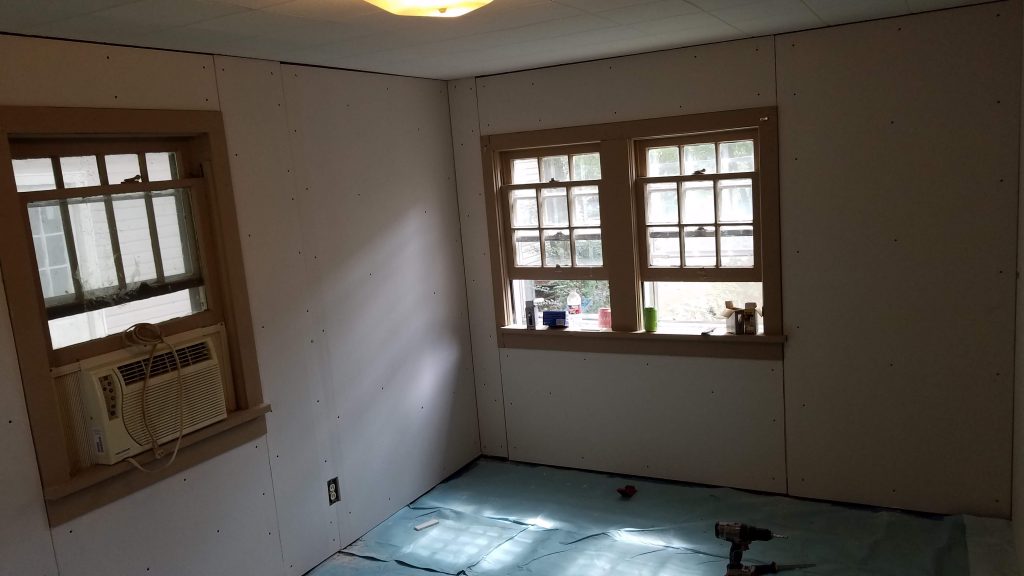
After a couple of hours of taping the joints, I have to say the pros online make this look easy… it wasn’t, and I will be spending a lot of time sanding and recoating. Although I have repaired plenty of drywall spots over the years, this is the first time taping out all the joints. I also should have put some extra nails in the panel as some places could have been straightened a bit before hanging the drywall. I will add that to my to my book of knowledge.
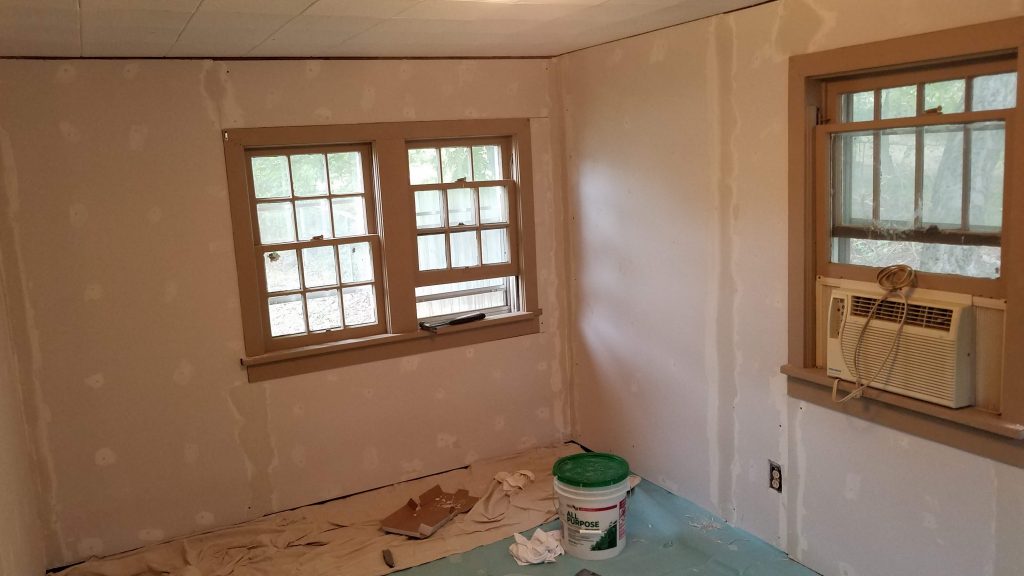
Second and third coats of joint compound complete. I did have a few spots of forth and fifth sand and touch-up. It did get easier to get smooth transitions as I neared the end.


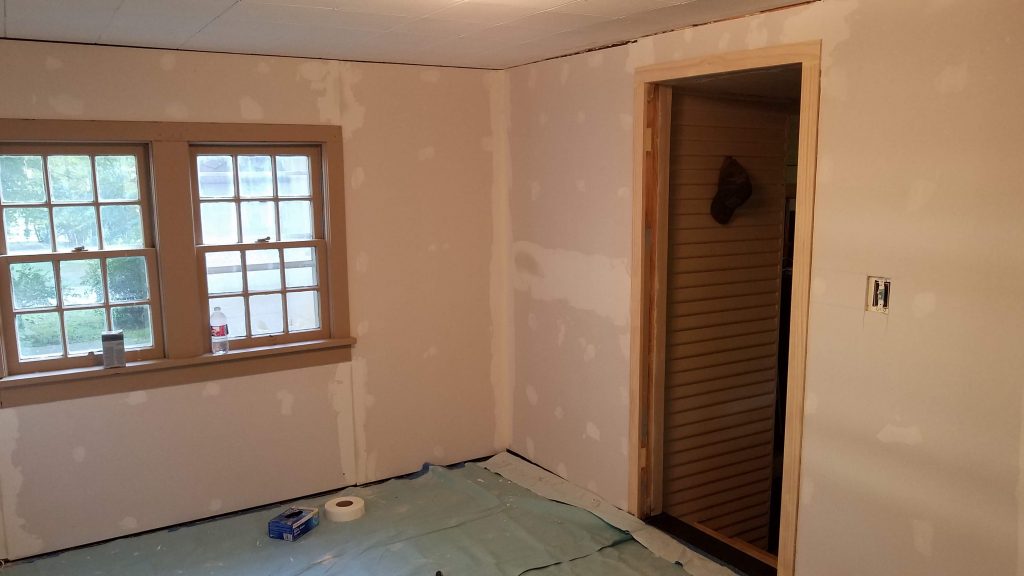
Also added a coat of Valspar drywall primer to help cover some of the imperfections and to ease the paint coverage.
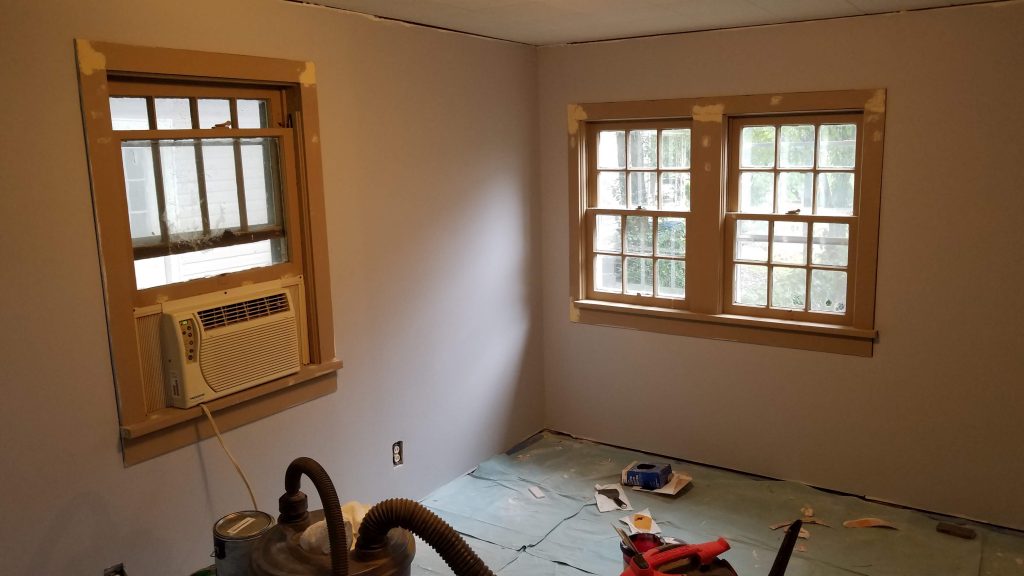
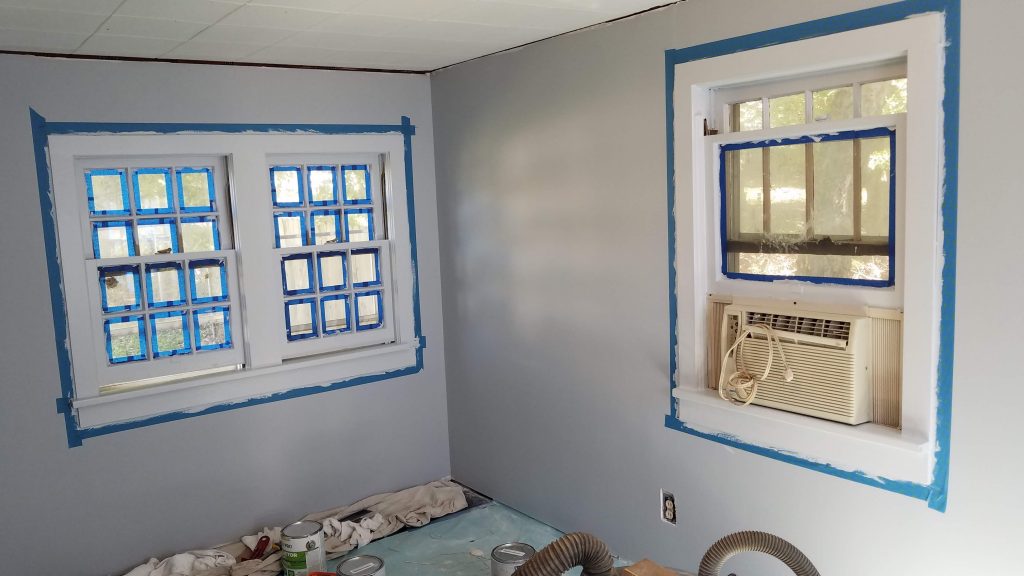
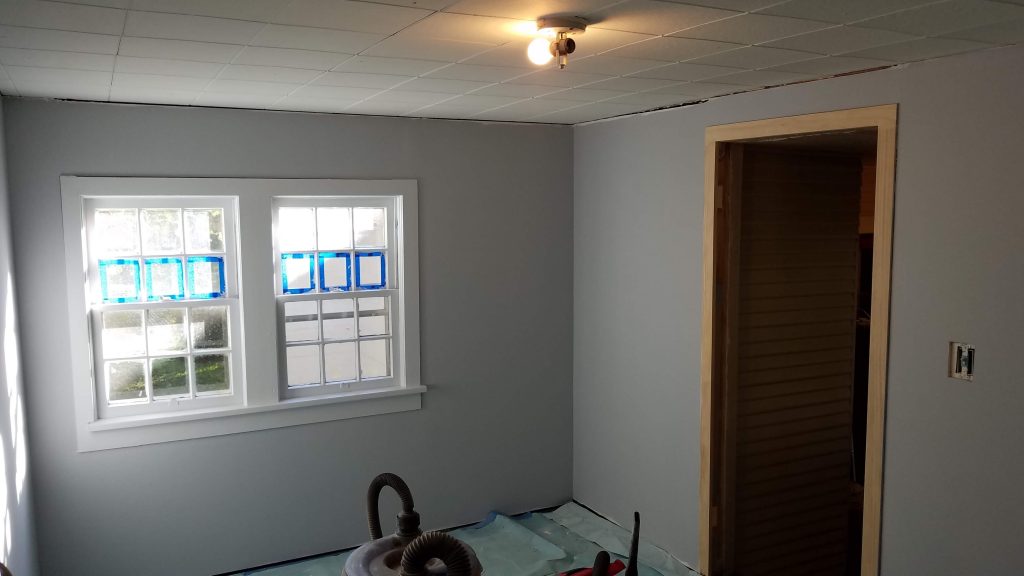
After the primer dried, it was time to put a couple of coats of paint on the walls, repair, tape off and paint the window trim. One of the things I did here was to first paint the window trim with a high gloss enamel white paint to help seal the wood and help protect from moisture. Although all the windows have storm windows installed, they were not always there, and the originals have had a few decades of moisture to deal with. Color pallet for this room is Sherwin-Willams Latitude HGSW1446 and Sherwin-Williams Olympus White HGSW1447.
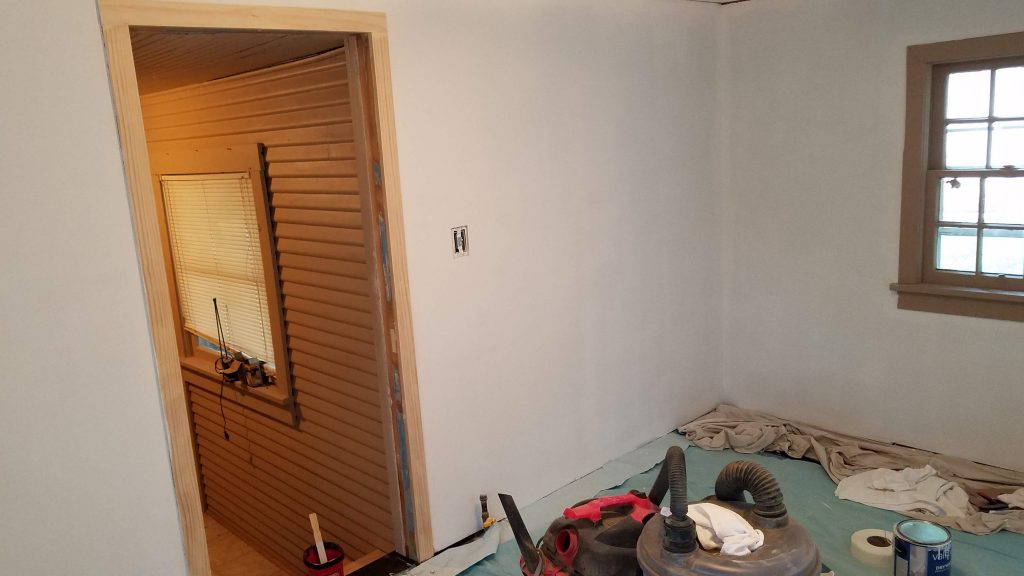
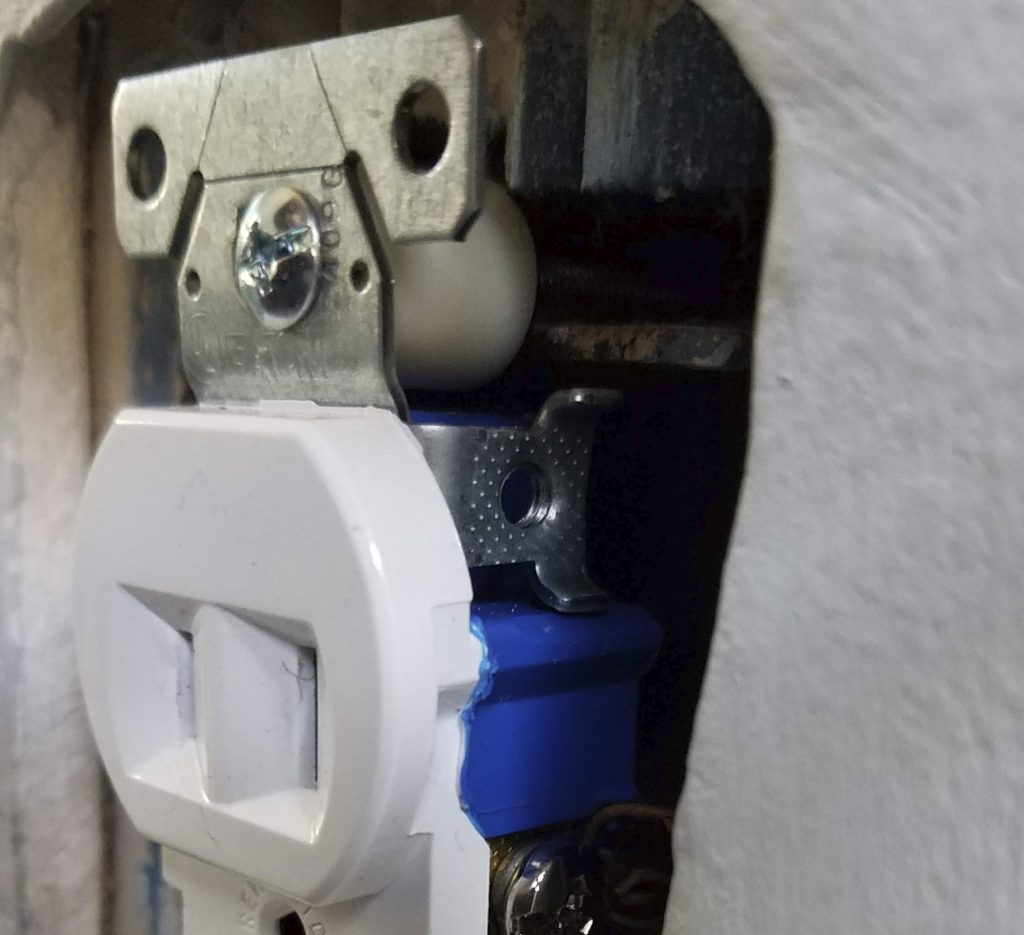
How I dealt with the electrical outlets and switches. One of the issues in these old houses is the wiring for sure but also the outlets and switches are old and decaying, and most are single pole non-grounded. The ones in this room were so bad that plugs would slip out with almost no force. The other problem I introduced is by adding 3/8 inch drywall over the existing paneling. The addition created a recess of all the outlets.
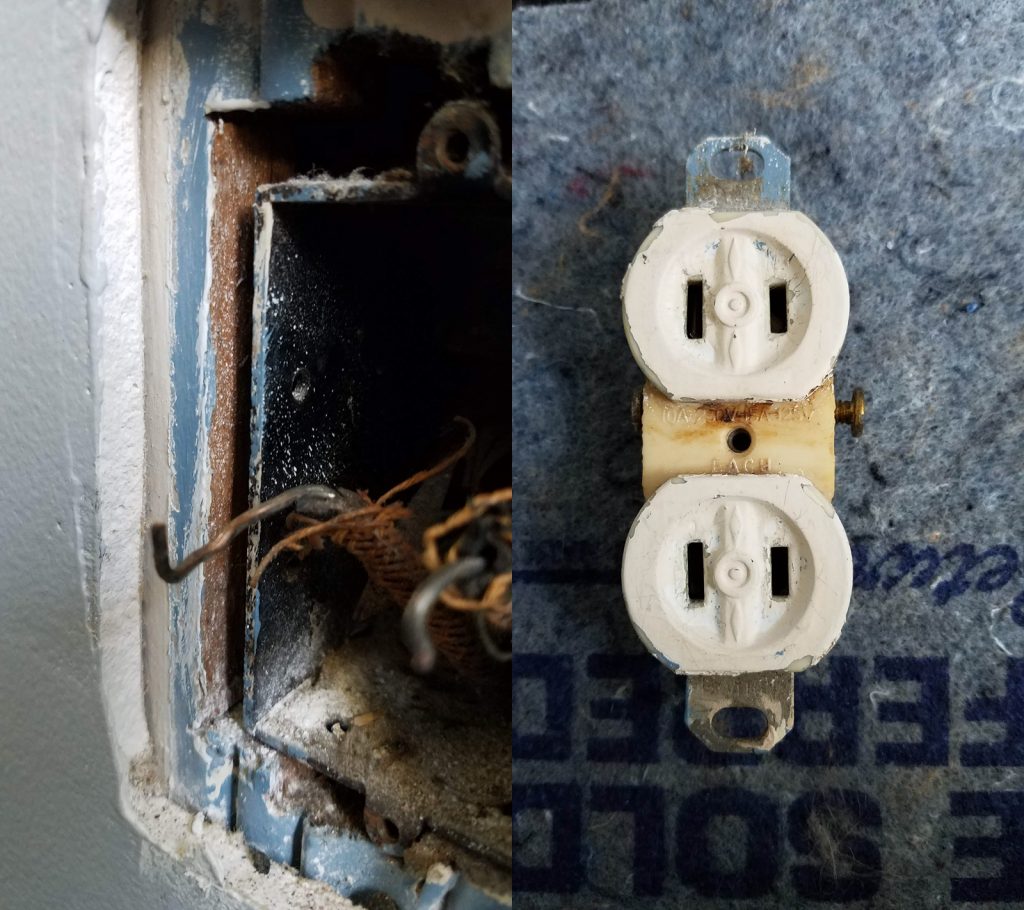
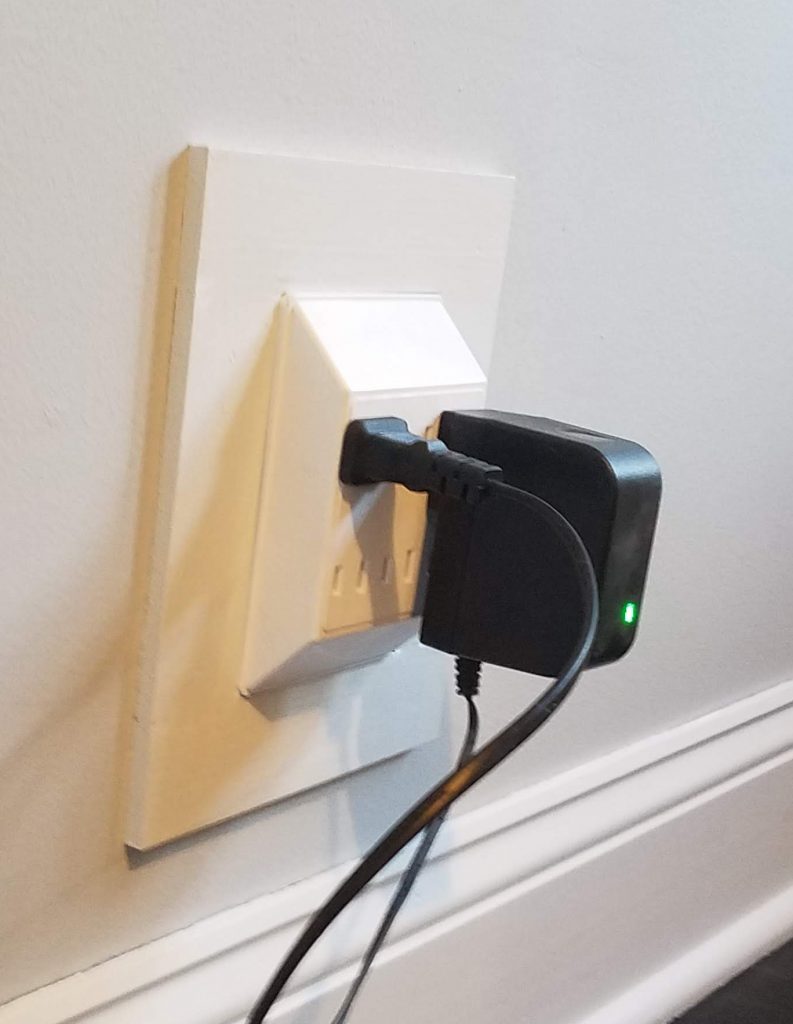
To deal with the gap created by the drywall, I added 3/8 inch nylon spacers to bring the outlet flush with the wall surface then added a six-way plug cover to each of the outlets. I also created a border around the two wall sockets.
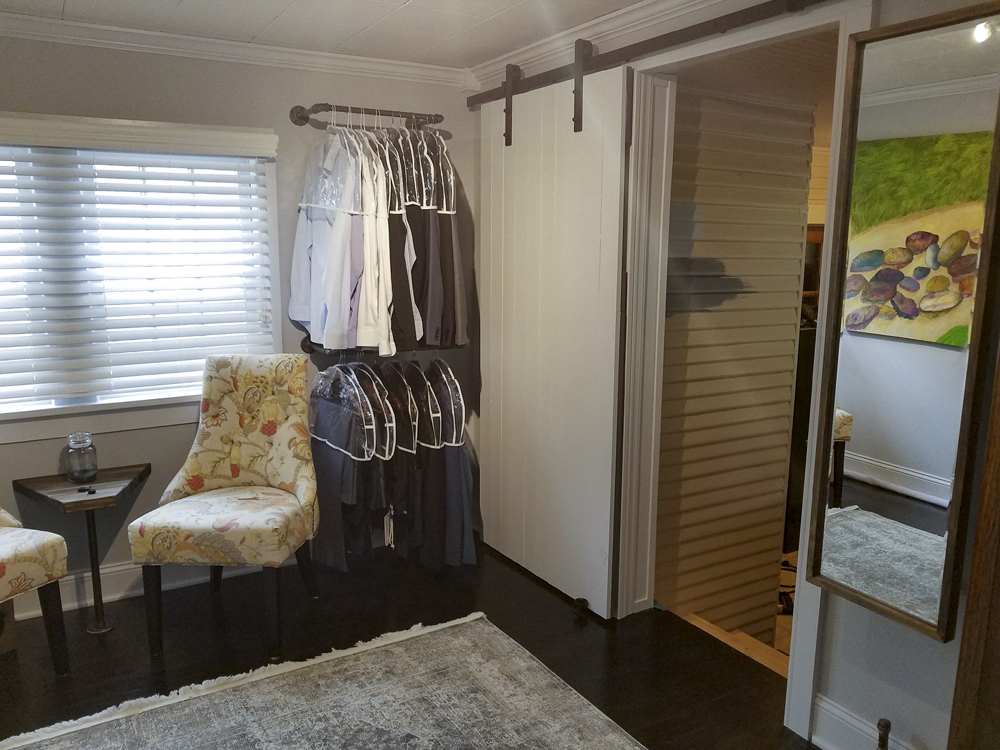
Next step is to install the crown molding and baseboards. This process ended up being a bit difficult. The ceiling panels in this room are far from level, and it was difficult to correctly line up the inside corner angles of long strips when doing this with one person. After a couple of hanging and remove episodes, I decided to use premade decorative inside corners.
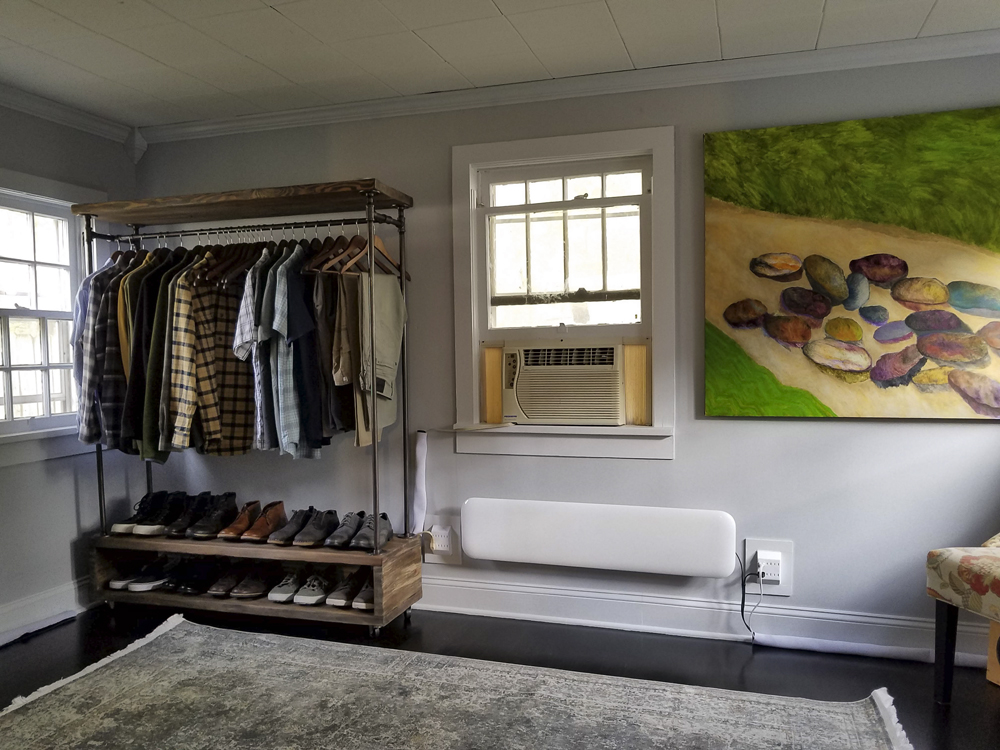
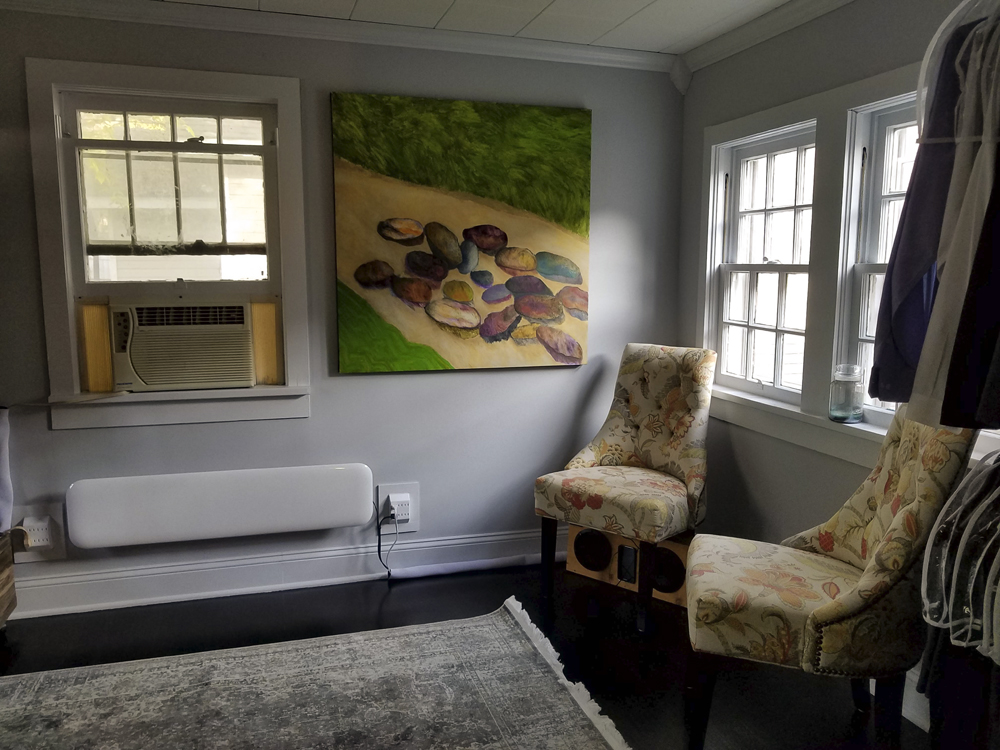
Installed the new electric wifi enabled smart panel heater. At the beginning of the remodel of this room, I removed the old gas heater that was an eyesore and a fire hazard. The Mill Panel Heater was an excellent option for this room as it added an updated touch and was reasonably priced. I plan on installing one in the laundry/mud room as well.
With all of the heavy work done (except building out the barn door for the room), the fun part begins as I build some of the furniture pieces and bring in some accent items.
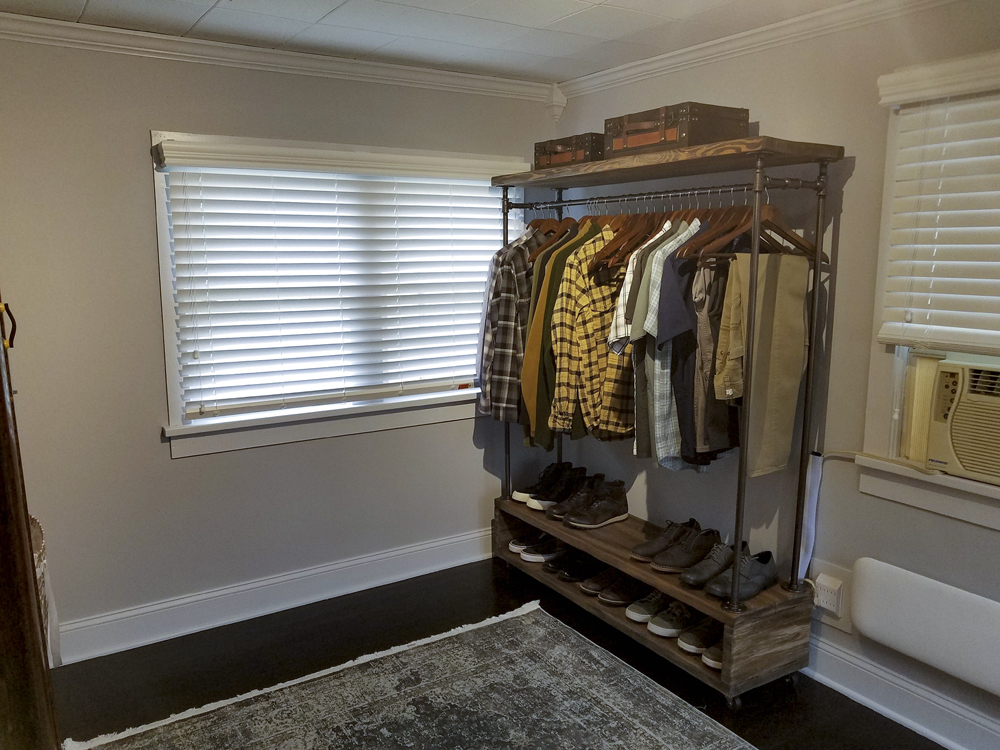
The first piece I constructed was an industrial rustic clothes rack. I usually photograph builds but was working quickly to get this one complete. Its made of construction grade 2×6’s. The 2×6’s are joined with 1/2 inch dowels and glue. The end screws are countersunk and covered with wood filler. To get the reclaimed wood finish, I used a rough brush blend of Minwax Dark Walnut and Minwax Classic Grey stain. The old caster wheels I picked up at a rural yard sale for 50 cents a couple of years back. I knew at some point I would find something to use them on.
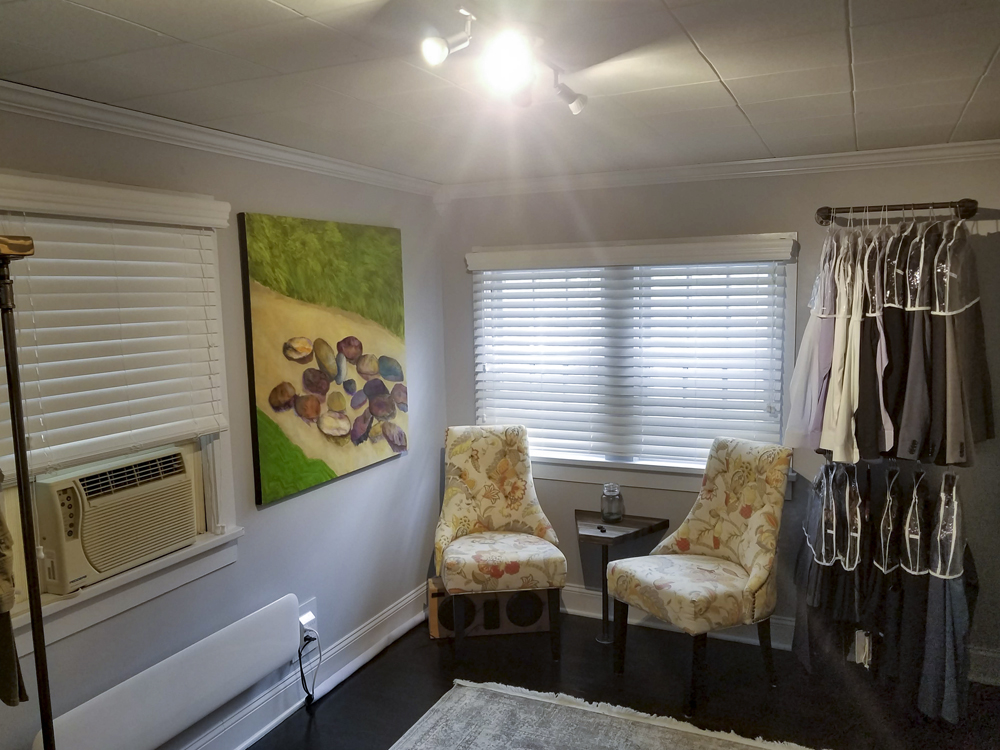
A few more updates. The rug and light fixture arrived, and I brought in an old armoire I purchased of craigslist for $75.00 a few years back. It was a great find.
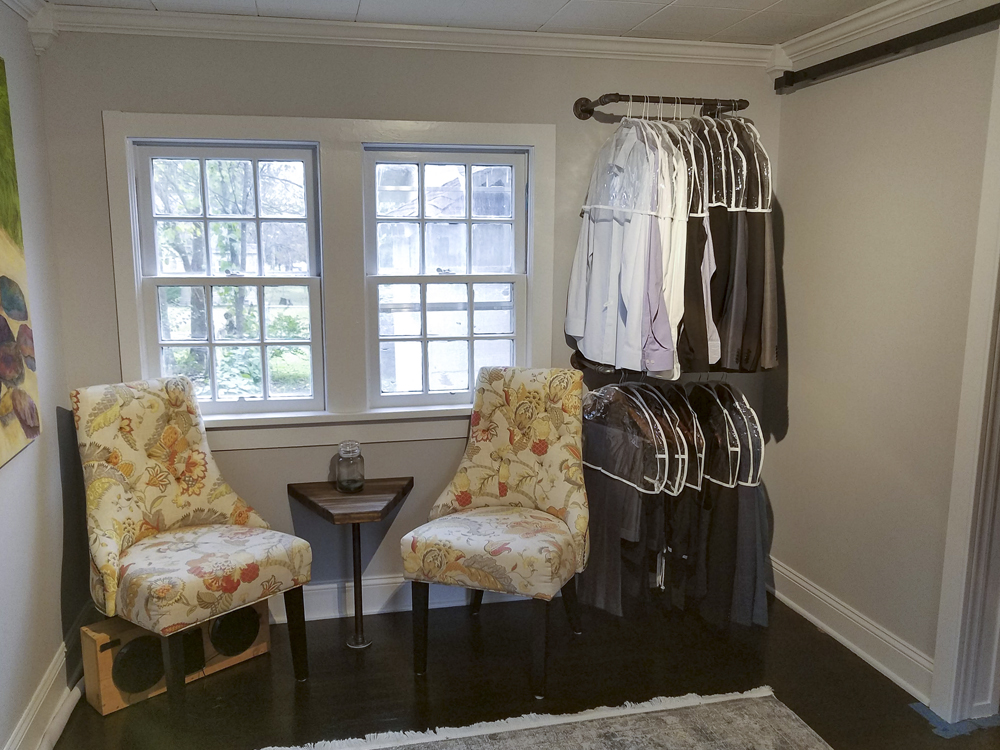
I have plans to build a small table for the chairs, a wall mounted mirror, and the barn door hardware should be delivered in a few days. I also need to order the blinds for the windows.
Finished the table, the wall mounted mirror and installed the barn door hardware. The barn door is measured and cut; I just need to put it together and paint it.
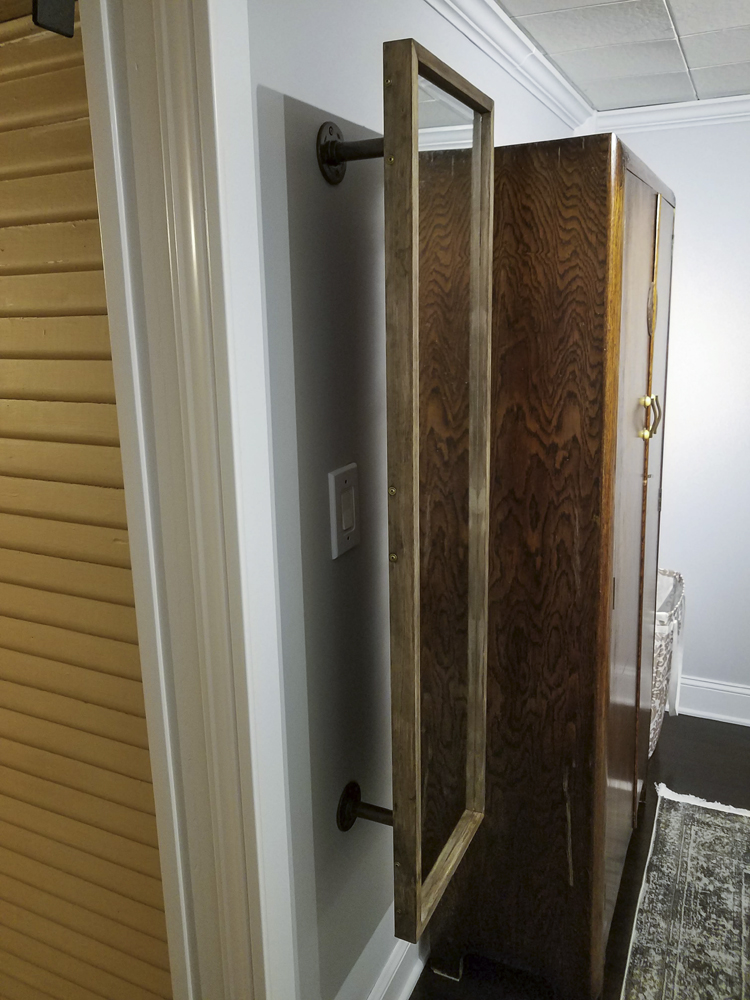
For the wall mirror, I wanted to use the space above the capped gas line as its unusable from a floor perspective which I may or may not address in the future. I decided to float the mirror off the wall to allow access to the light switch. I constructed a simple frame for the mirror out of 1×2’s and put three sections of 1×6’s as attachment points for the mirror. The mirror is attached with Liquid Nails to the 1×6’s, and the mirror itself was $20.00 from Walmart. The pipe fittings attach to the 1×6’s to float the piece off the wall.
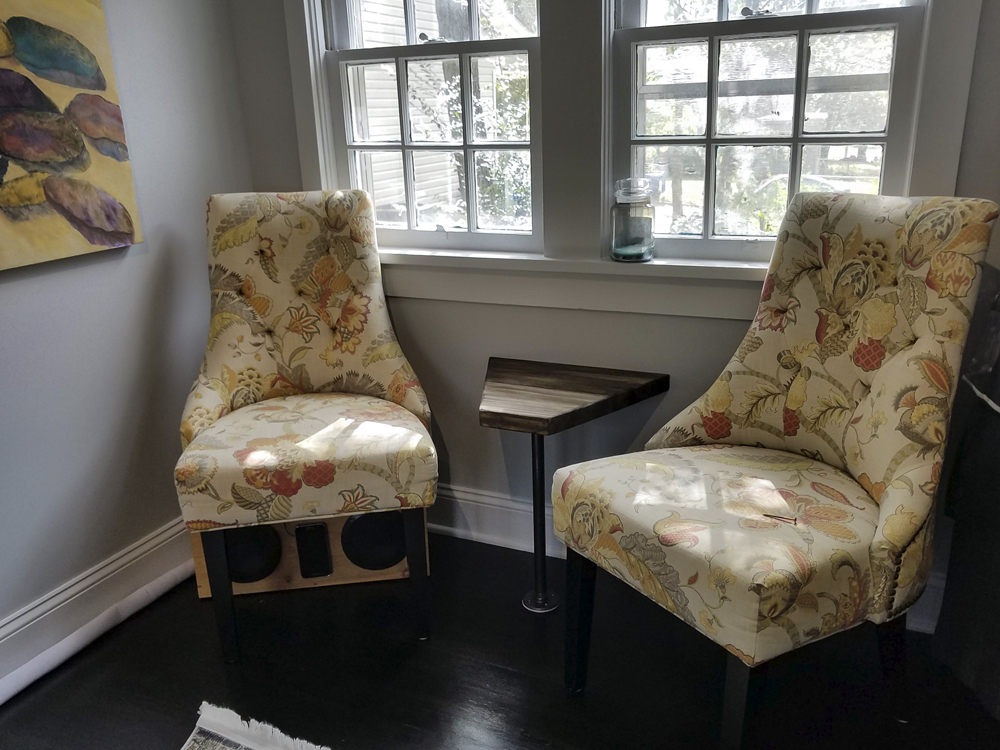
The table is a simple design I have done before a trapezoid cut out of joined 2×6’s. This design allows a decent amount of space that works well between two angled chairs.
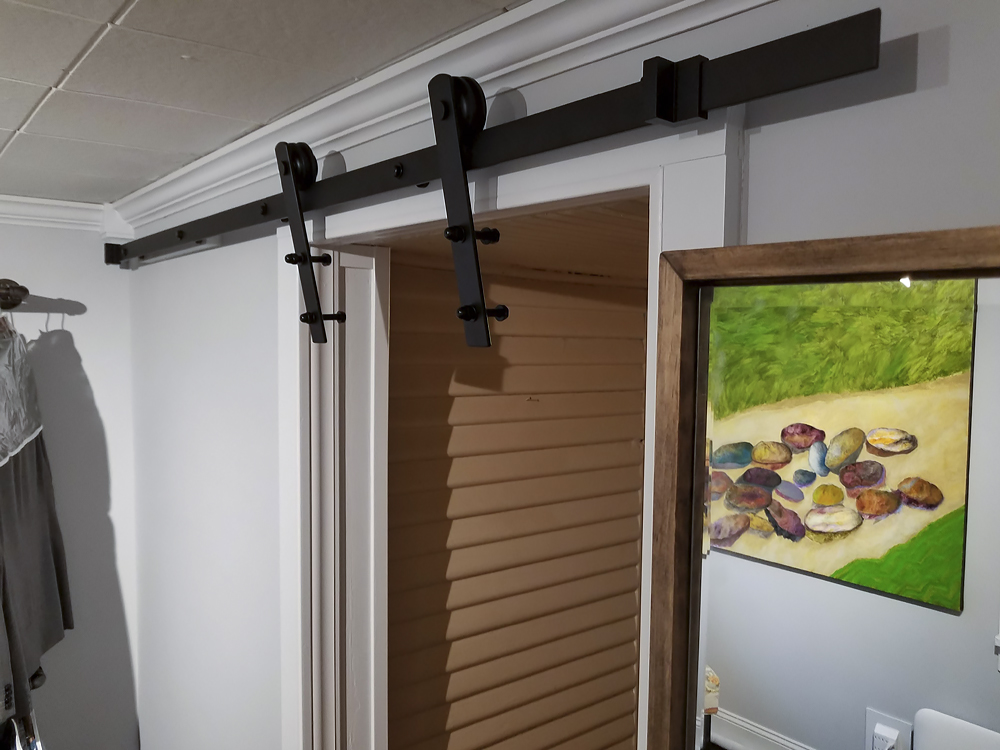
Simple barn door hardware installed. This unit is a $36.00 set from Amazon. Pretty simple setup and seems to be decent quality.
The barn door is coming along. I may have to end up redoing this as this is mostly made from scrap lumber that had been covered under the carport but it has been unseasonably damp here, and the pine slats may shrink up. I will have to wait and see.
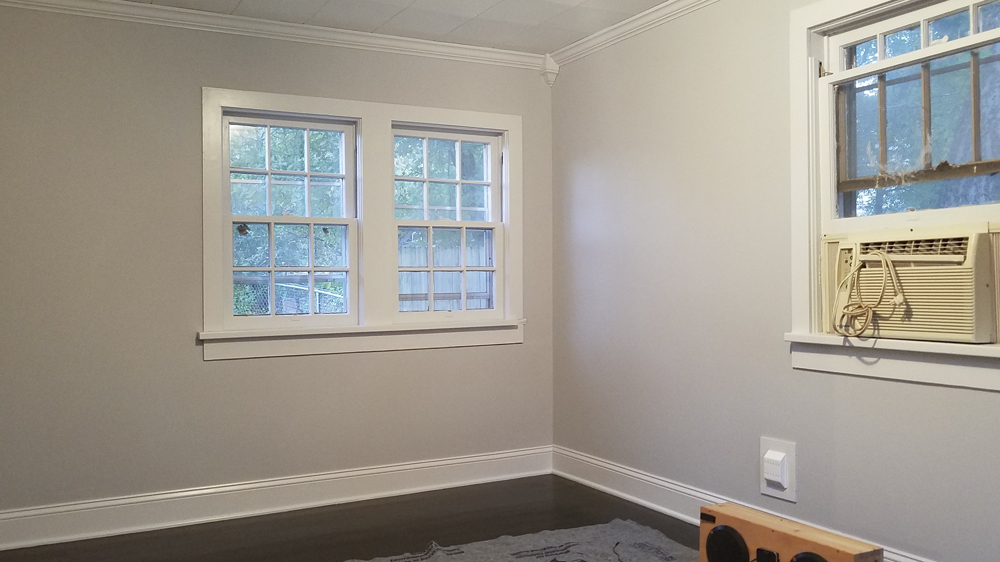
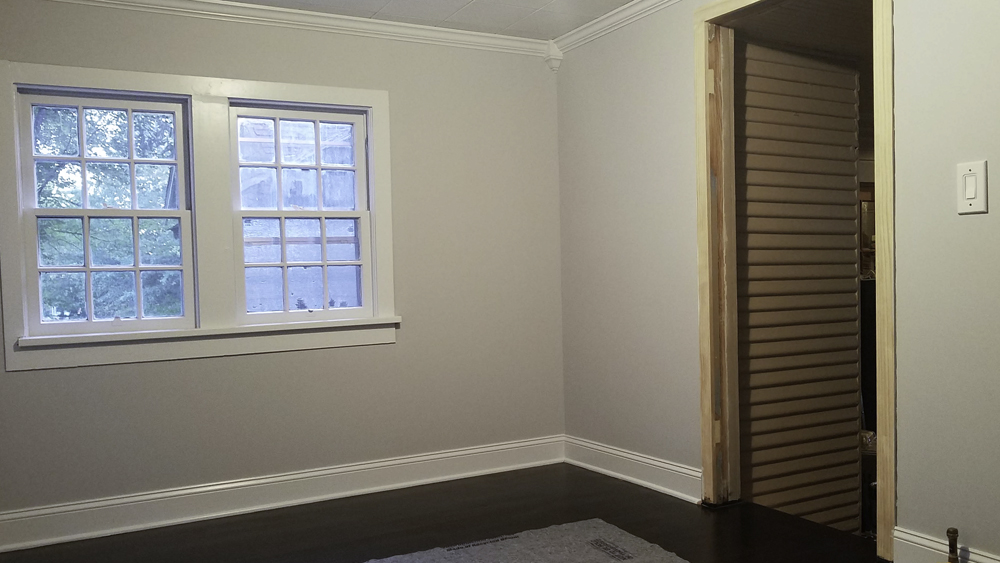
The room is complete with the blinds, new light fixture, and the barn door installed.
Before and after photos
(ok… after and before pictures I didn’t think when I put them together and too lazy to go back and change.)

On to the laundry/mud room remodel which can be found here.